XL Big Green Egg Table
I received a request on my YouTube channel to re-do the plans for the Big Green Egg table using an XL Big Green Egg as opposed to a Large. If you have a Large Big Green Egg, you can find the original post here.
I’d like to caveat that I have not built this table with the dimensions of this post. I can vouch for every step with the Large table. What I can say for this Extra Large table is that I went through the same design process.
Big Green Egg actually has recommended specifications for tables on their site. For this post we’re focusing on the XL Egg.
Your first decision point is the overall size. For these plans, I’m using the dimensions recommended by Big Green Egg. This table is 60 inches long, 31.5 inches deep, and 32 inches tall. Making the top 31.5 inches deep allows you to use 1x4's without having to rip any boards. The entire table will be made using only cross cuts. I also decided to use 4x4's for the legs for stability and ease of adding casters.
If you are just looking for an overview, here's a video of the build. Scroll down beyond the video for the detailed steps.
Note: the video is for a Large Egg. Be sure to use the measurements in this post as opposed to any measurements referenced in the video.
Reminder: all dimensions are for an Extra Large Big Green Egg in a table that is 60 inches long, 31.5 inches deep, and 32 inches tall.
SketchUp file of the final product:
Materials Used:
2 4x4's at 6 feet
5 2x4's at 8 feet
9 1x4's at 10 feet
Finishing Materials Used:
Recommended Tools:
I used a combination of pressure treated pine and whitewood for my table. I knew I was going to cover my table, so I wasn't worried about the elements. I also wanted to do this at a low price point because my ultimate plan is to do an outdoor kitchen down the line. Pick the best type of wood for your situation.
While you don't have to use a Kreg Jig, I highly recommend it if you are new to woodworking. It's a great tool to have, especially for beginners.
Step 1: Cutting Your Materials
Cut the lumber to length to get the following pieces:
A: 4 - 4x4 at 31.25 inches - Table Legs
B: 4 - 2x4 at 50.5 inches - Long Aprons and Stretchers
C: 2 - 2x4 at 23.75 inches - Short Aprons
D: 5 - 2x4 at 27.75 inches - Top and Shelf Supports
E: 8 - 1x4 at (let's hold off for now) - Shelf Slats
F: 9 - 1x4 at (let’s hold off for now) - Top Slats
Tip: If you are going to add casters to the table, you may want to cut the table legs shorter. Consider subtracting the height of the casters from the length of the table legs.
Step 2: Drilling Pocket Holes
You'll want to drill two pocket holes at the end of each 2x4 you've cut. Make sure to set your Kreg jig for 1.5 inch thick material and 2.5 inch screws. Also, make sure all four pocket holes are on the same face of the board.

Step 3: Assembling the front and back supports
Connect the Long Apron (B) to each leg. It's easiest to do this with everything on the floor as shown in the video. This helps for easy alignment, and it keeps the Long Aprons flush to the legs.
Now that your top Long Aprons (B) are fastened, it's time to add the Stretchers (B). These will support the lower shelf of the table. Reference the Big Green Egg table plans to get the placement of the Stretchers. For an Extra Large Egg, there should be 12.5 inches from the top of the top Long Apron to the top of the Stretcher.
Repeat this process a second time. You should have two components that match the drawing below.
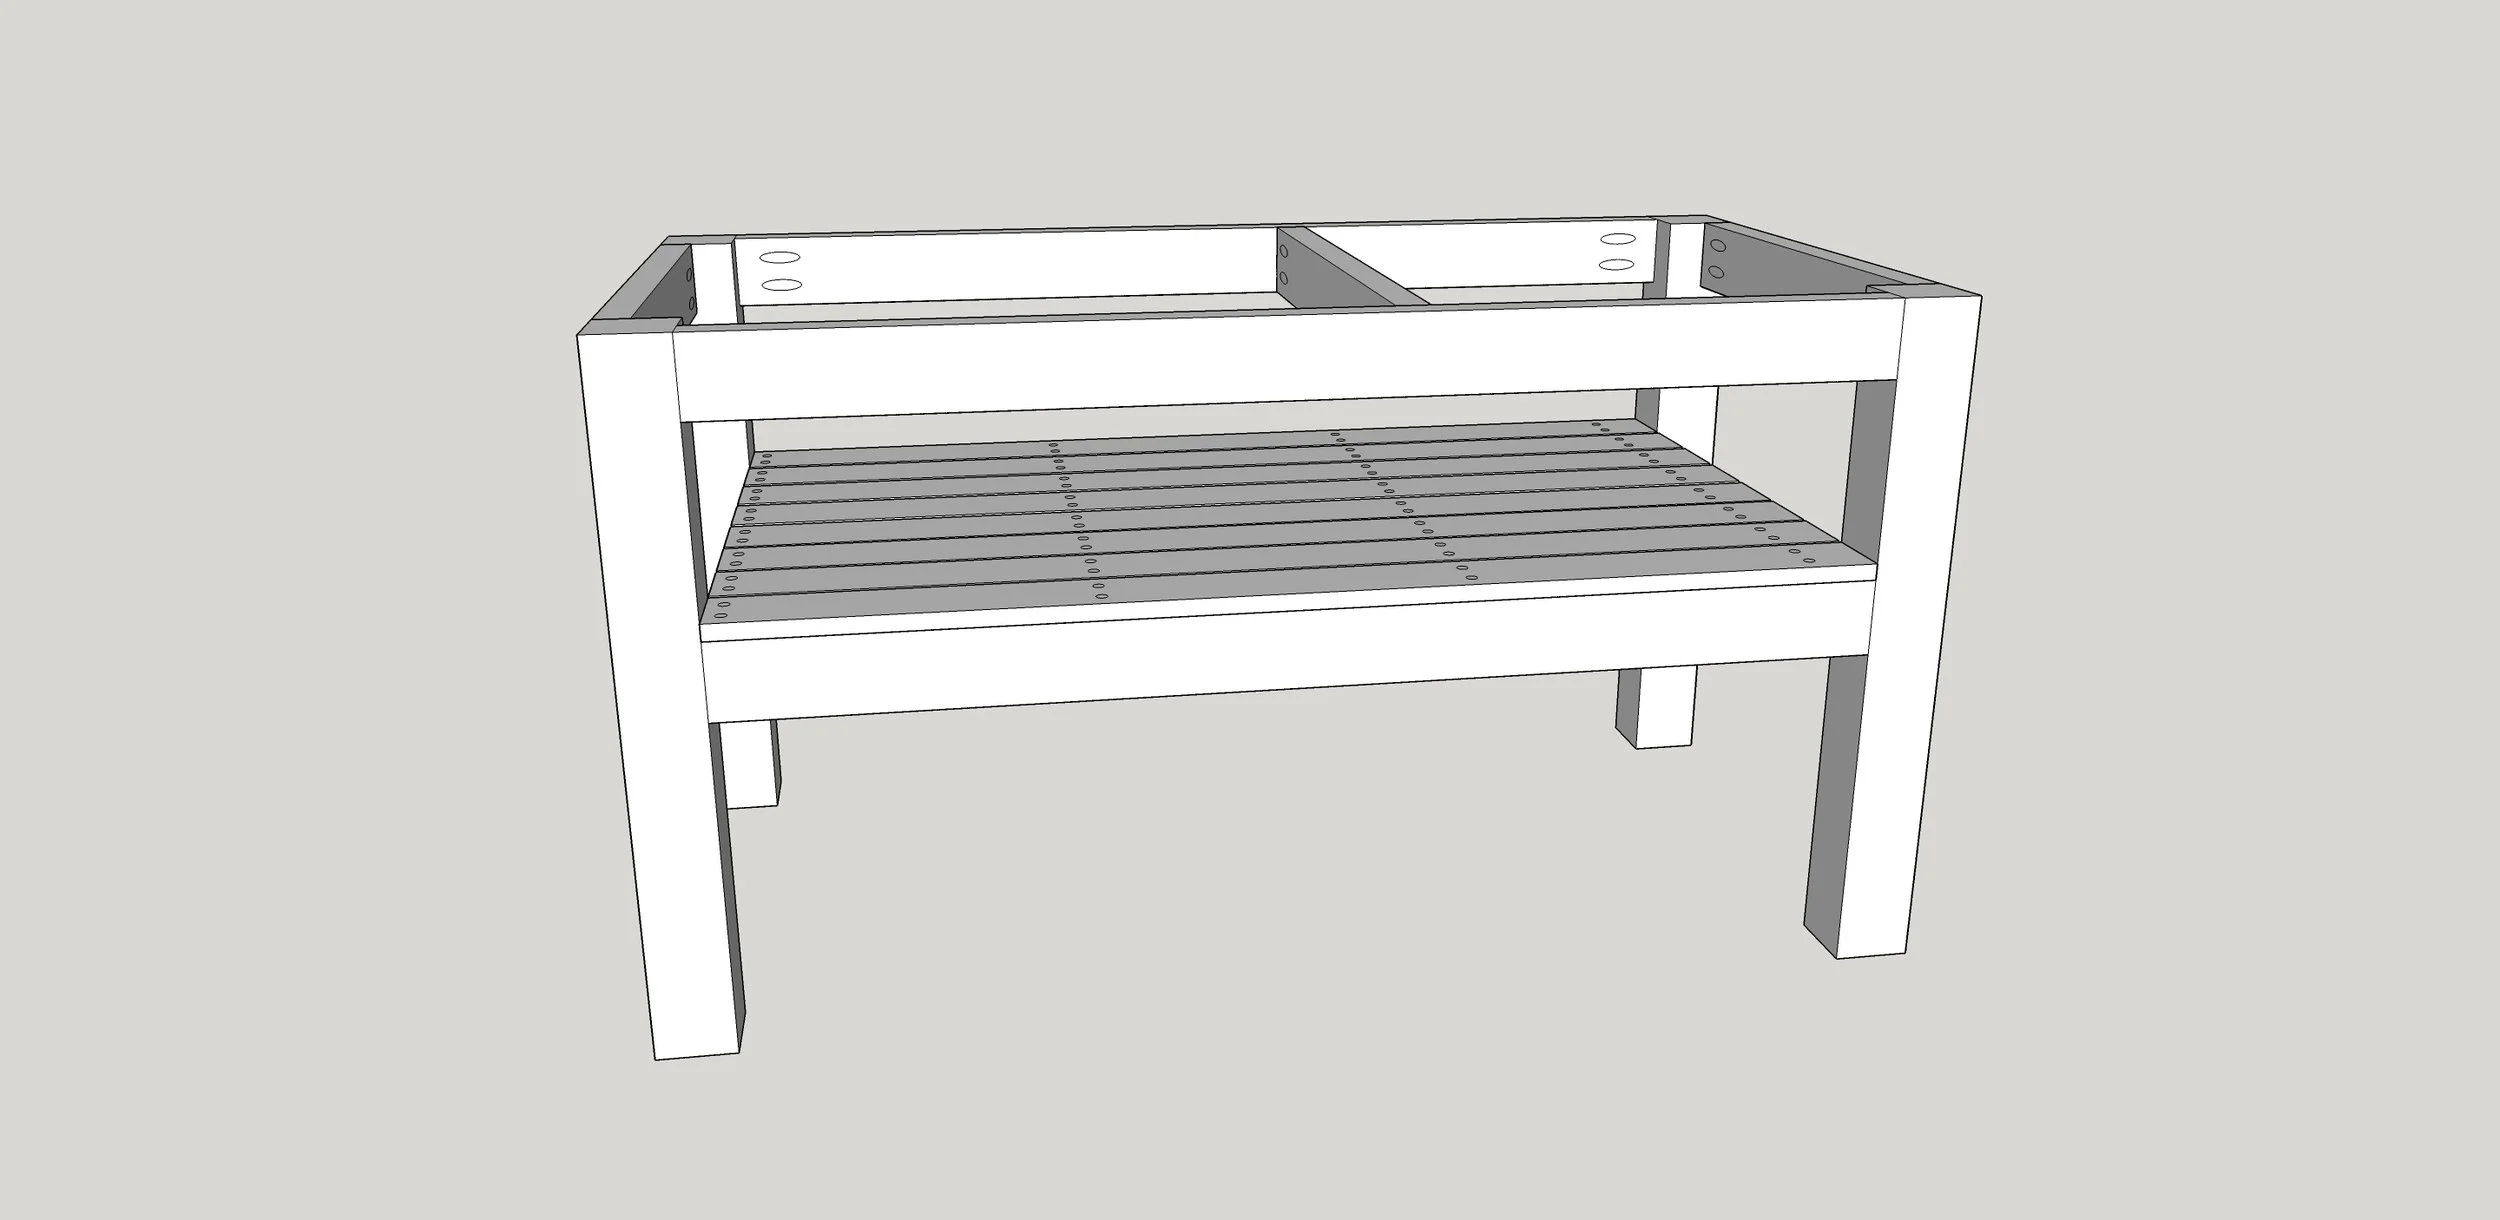
Step 4: Adding the Short Aprons and Supports
I like to do this step with the table upside down. Join the Short Aprons (C) to the front and back constructed in Step 3. Make sure your pocket holes are facing to the inside of the table in order to conceal them. Finally, join one support (D) in the middle. This should go in the middle of the table. There should be 30.75 inches between the edge of Short Apron (C) and the edge of Support (D) on the side of the table you plan to place your Big Green Egg as shown below. Note: the placement of Support (D) here is important as there must be room to cut the hole for the Big Green Egg later.
Now add the remaining 3 Supports (D) to the Stretchers as shown. The exact location of the inner Supports does not have to be precise, but you can leave about 15 inches between each. Remember to face pocket holes in to hide them!
Now that Step 4 is complete, you can flip the table back upright. It's time to add the shelf and top!
Step 5: Measuring and Cutting the Shelf and Top Boards
You may recall that way back in step one I didn't provide the lengths for the shelf or top slats. There's a reason! I find it best to measure after the completion of Step 4. This way you know exactly what you need. If everything has gone to plan, you should be cutting the Shelf Slats (E) at 50.5 inches. You should also be cutting the Top Slats (F) at 60 inches. Note: the 60 inches for the top slats account for an overhang around the table. You may want to just keep the Top Slats (F) at 60 inches and just have the overhang vary. You should definitely take a new measurement for the Shelf Slats (E) to assure they will fit.
Remember you add 2.5 inches to the the 57.5 inch measurement shown to account for the overhang of the Top Slats.
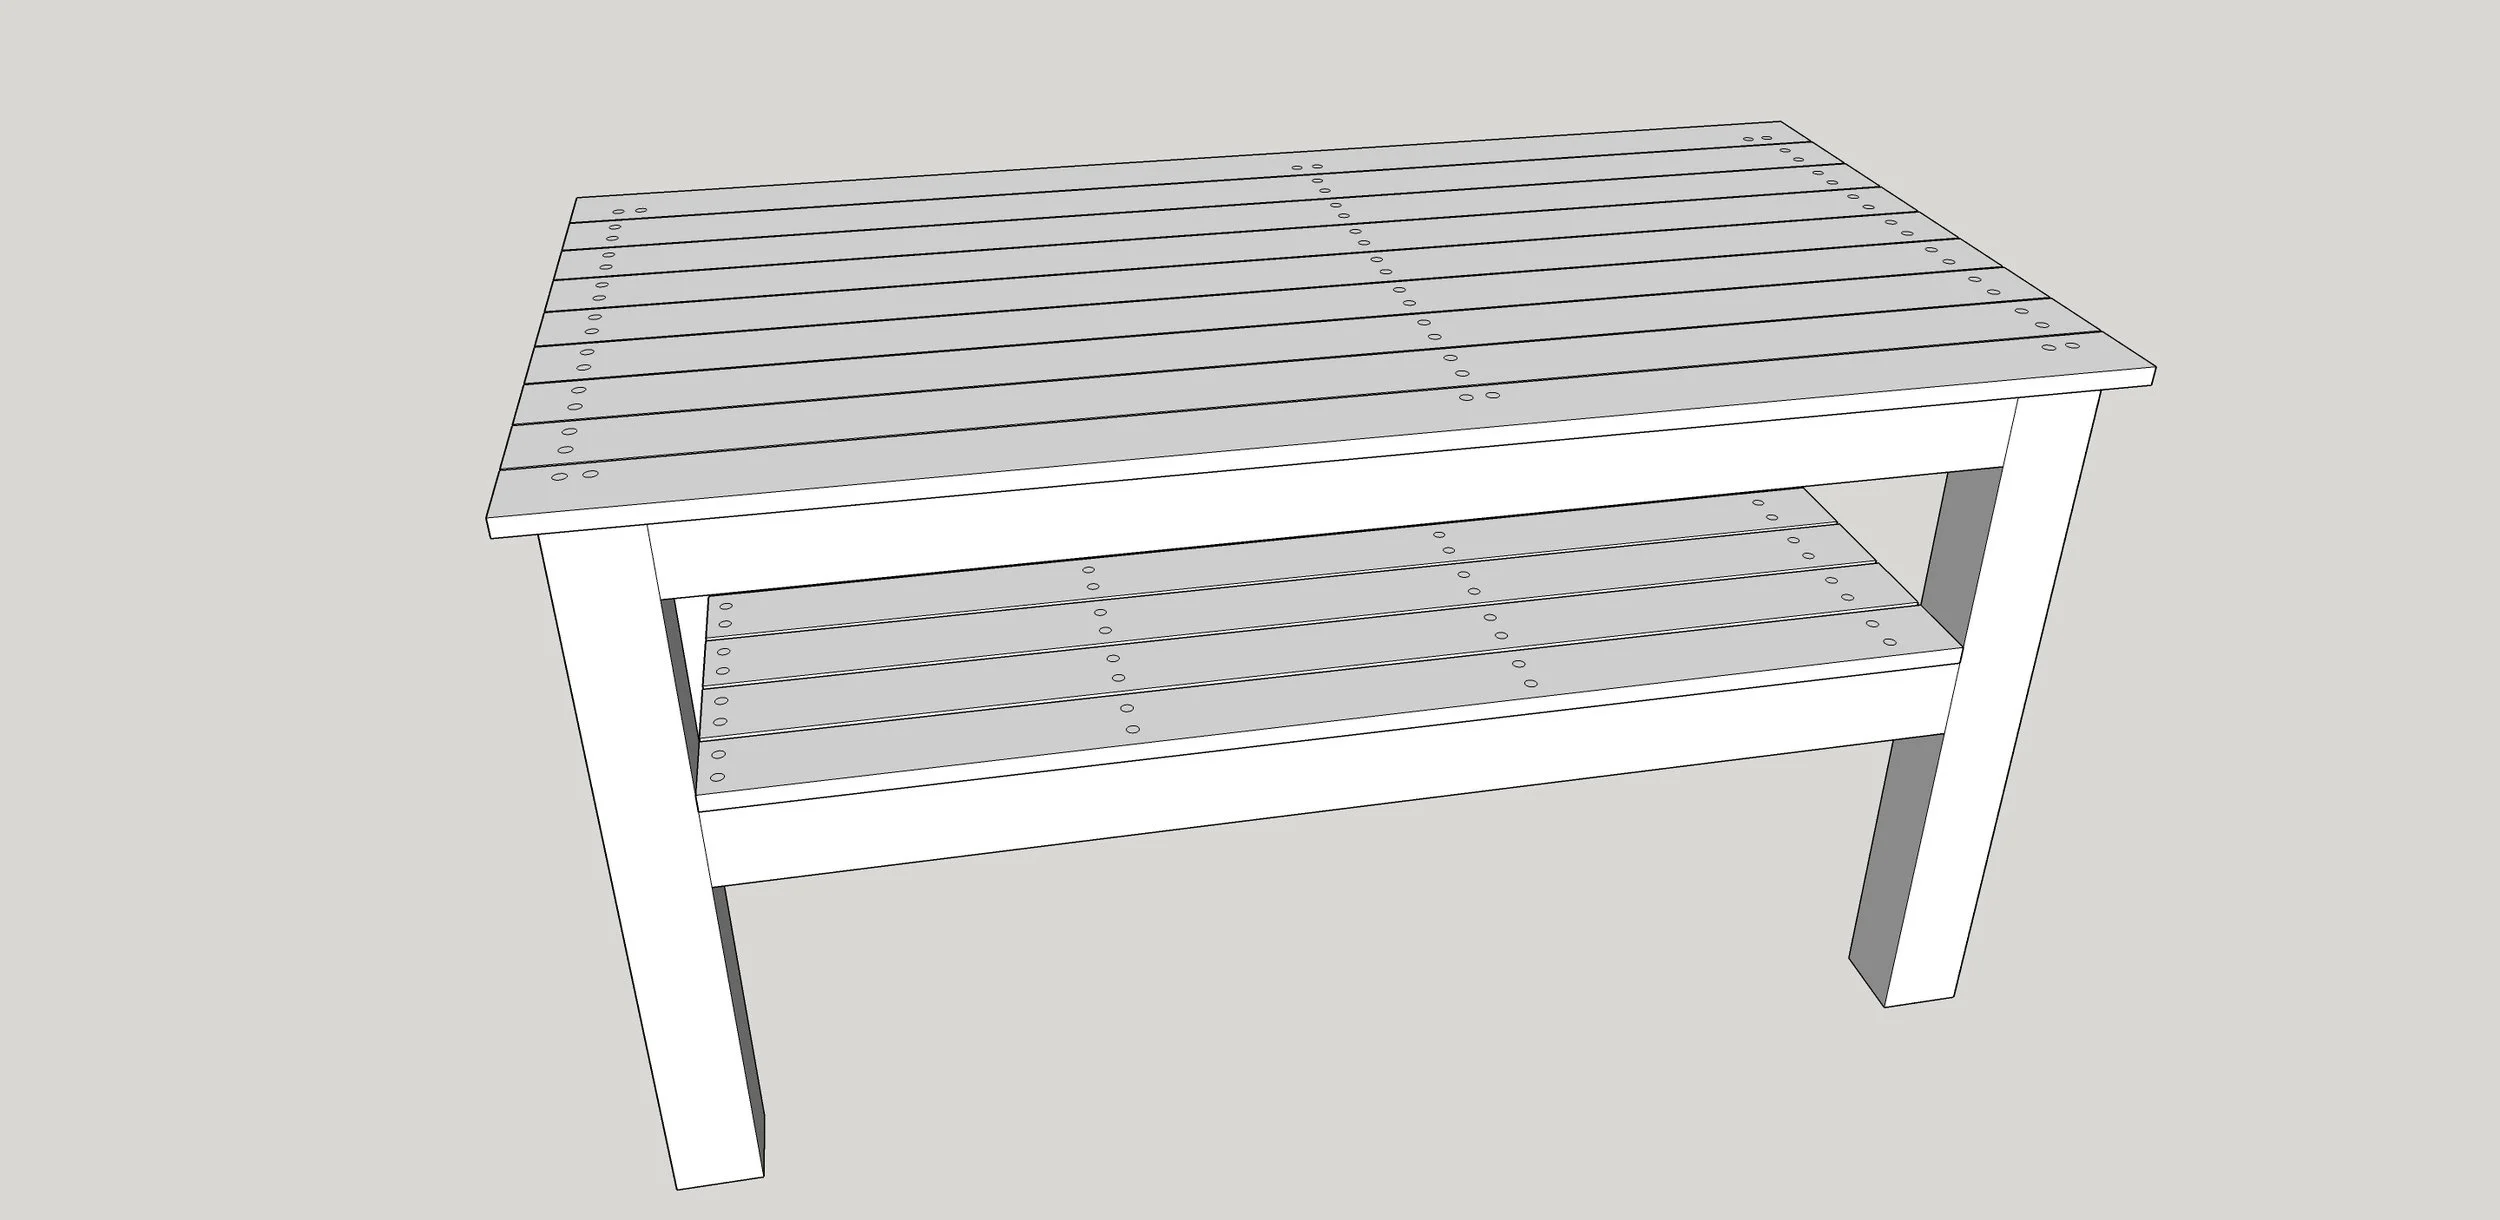
Step 6: Adding the Shelf Slats
Now that your Shelf Slats (E) are cut to match the distance between the table legs, dry fit them in to place. Place the outer slats first to be flush with the Stretchers, then fill in the rest in between. You will need to leave roughly 3/8 of an inch in between each slat. This obviously does not have to be perfect. Once you have them in place, it's time to screw them down. You will want to screw down the Shelf Slats to the Supports with the 2 inch deck screws. It is best to drill pilot holes with a countersink drill bit. When complete, the bottom shelf should look like this.
Step 7: Adding the Top
Now it's time to fasten the Top Slats (F) to the top of the table. This is very similar to step 6. The key difference is you don't need to leave a gap in between the slats. You can get these boards flush edge to edge. Again, be sure to dry fit the top first. Make sure you have a uniform (or close to it) overhang around the edges of the table. The plans are for these to be 1.25 inches on the ends and 3/8 inches at the front and back, but again go with what looks good to you. Counter sink pilot holes and then fasten the boards down with the 2 inch deck screws. Now you have a table!
Tip: Be mindful of pocket screw location from the table base when fastening the top slats. I used shorter screws that I had on hand in these areas.
Step 8: Cutting the Hole
While you may have built a table, you still need a place to put your Big Green Egg! For an Extra Large Egg, you need a hole with a 26.25 inch diameter. Find the center of the hole for the opening. If you've been following the plans, the center should be 17.875 inches from the side edge of the top and 15.75 inches from the front edge of the top. Here's a rendering with all of the pertinent measurements.
To actually cut the hole, put a screw in the table top in the center of the hole to be cut. Tie a string to the screw, and measure off 13.125 inches (the radius of the hole to be cut). Then fasten a pencil to the end, and draw the hole. Double and triple check your hole before cutting.
Next, drill a hole somewhere inside the desired hole. Then, use a jigsaw to cut out the hole. Take your time because you only have one shot at this. Remember you can always cut more away if needed, but you can't add anything back! Also remember you can sand afterward to smooth everything out.
Tip: I thought it would be a good idea to cut a smaller hole as practice. I would not recommend this. Once the boards lose their tension, it becomes harder to cut them with a jigsaw. If you want to practice, do it with some scrap.

Step 9: Finishing Touches
If you wish, you can add casters for a mobile table. Make sure to get casters that can support the weight of the table and the Big Green Egg. Also make sure to get locking casters, so that you can lock your table into place.
Tip: If you are going to add casters to the table, you may want to cut the table legs shorter. Consider subtracting the height of the casters from the length of the table legs.
Since this is going to be outside, you should also add a finish. This really depends on what type of wood you choose for the project. Consult with your local hardware store if you're unsure how to finish the type of wood you chose. Since my table is made from pressure treated pine and whitewood, I first applied a stain. After that, I applied a few coats of polyurethane. Again, I have a cover for my table, so this is more for cleanup on the top than protecting from the elements.
Finally, add some accessories. Get some hooks to hang your grill utensils from. Maybe add a bottle opener as well. Have fun with it!
Wrap Up
I hope you've found these plans to be helpful. Feel free to leave a comment with your feedback. Also, I'd love to see pictures of tables built with these specs!